How to put a bike on a bike rack?
The first road trip with a bike mounted on a rack can be tricky. I for sure did not feel comfortable driving with the bike attached to the car. I wasn’t sure about multiple things. For instance, if the bike rack can handle speeds above 80 miles an hour, can it stand road bumps, or would the bike remain mounted through strong crosswinds? Most importantly I wasn’t sure I had put the bike on the bike rack properly! Let’s review the steps to put a bike on a bike rack
A simple guide on how to put a bike on a bike rack?
Placing a bike on a trunk bike rack might seem like a fairly simple task but it takes time and practice to get it. Since bikes and especially road bikes are so expensive, we want to ensure that we are doing everything right when it comes to mounting them on the racks.
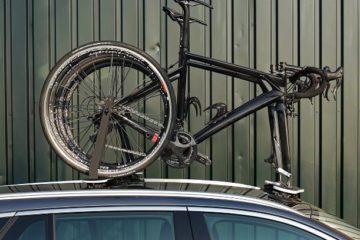
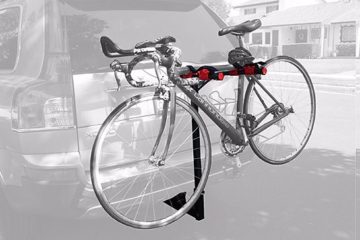
In this particular demonstration, I used a Specialized road bike on a Toyota Corolla (sedan) but this would be processed for other sedans such as the honda civic. The bike rack that was used was an Allen Sports 2 – bike trunk rack (Model S102) which is rated as one of the best hitchless bike racks. Trunk bike racks are one of the best bike racks for SUVs and Cars due to their design and cost. On the contrary, Hitch bike racks require a hitch while roof bike racks require roof rails which increases their cost. Most roof bike racks normally are designed for single bikes while the hitch caters to multiple, but you can find a single bike hitch rack as well.
Trunk bike racks are designed in a way that makes one end of the rack sit on the trunk while the other sits on your license plate/bumper. There are five straps with two straps fixed on the top of the bumper, two on the side and one going under it. While the one in the picture is an older model but the process stands true for the newer models as well.

Step-by-step guide on how to put a bike on a bike rack?
Step 1 Sanity checks on the bike rack
A bike falling off the rack due to a bike rack strap failure or a loose-fitting at high speeds would be the worst nightmare for any bike owner. Hence, it is essential to check all relevant parts for any wear and tear. Since the straps on a bike rack are made out of rubber, they are prone to failure due to various issues like age, weather, etc. I have had one such failure in recent times (luckily no bike damage) and had to come up with a makeshift solution till a new strap was arranged.
Step 2 Choose the right direction for the bike
After you have ensured that the straps are fairly tight and everything is according to the instructions on the bike rack’s manual, it is equally essential to figure out the direction you place your bike in. The answer to that really depends on the type of rack and bike you own; for instance, some bikes might be too high or too low in a given direction. In my case, I figured that the chain ring facing the car side ensures that the bike is both stable and at the right height (as pictured above).
Step 3 Place the bike’s top tube on the cradles
Carefully place the bike on the rack with the top tube resting on the designated cradles. In a bike rack that has slots for two or three bikes, you have the option to use the cradles closer to the car or the ones that are further away from it. I personally find the ones closer to the trunk area to be more secure. It can of course vary from case to case as sometimes if the bike is placed on the rack nearer to the trunk, it runs the risk of damaging the car’s paint job.
Step 4 Fasten the rubber straps
Fasten the rubber straps on the cradle. A snug fit is recommended because tightening too much would run the risk of damaging the straps and losing would mean your bike might fall off if you hit a bump. The straps are there as support for the bike, but remember to be vigilant when fastening the straps as they do not carry the complete load of the bike.
Step 5 Re-tighten the straps
Once the rubber straps are tightened, check the trunk top, side, and bottom rack straps. It is almost always the case that once the bike is put on a bike rack, the rack straps tend to loosen up. You want to ensure they are fully tightened after settling the bike on the rack.
Step 6 Lock the bike
It really depends on which part of the world you are in but it is always a good idea to add some security to your bike. A lot of videos online show instances where bikes have been stolen from a rack while the car stops at a signal or is stationary anywhere else. It is therefore highly advisable to add a lock to the bike.
Pro Tips!
1. Put electrical tape on the metallic strap ends
The cradle on which the top tube of the bike rests is made of plastic and a rubber mix material that does not damage the car paint. However, the metal ends of the straps can damage your car paint. In order to avoid the metal-to-metal rub, I wrap some electrical tape around the ends. The tape acts as a good protective measure against expensive paint damage on the car or worse, the bike!
2. Never leave your bike computer, lights, bottles, or bags on
The bike rack is safe for the bike but there are no promises in articles that are easily detachable from the bike. I once lost a front light traveling on the highways due to strong cross winds. While this was a fairly small loss, leaving a Garmin or a Wahoo on the bike can result in a much bigger loss.
3. Strap the handlebar
This is only possible if you have a free rubber strap and are probably only traveling by one bike on the rack. Simply turn the handlebar in a position where one end can be strapped around the vacant cradle just the way in the picture. This will ensure that your handlebar does not keep hitting the trunk or scratch your car.

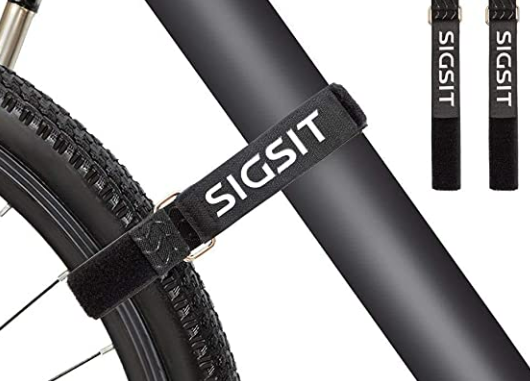
Wheel Stabilizer Straps
An innovative way to stop the bike wheel from spinning and of multiple other uses on bike racks and related products. One could always use it as an additional measure to keep the unwanted movement of the bike or rack while on the move
FAQ 1 How tight should the straps be?
The straps should be taut. Do not over-tighten or leave them too loose. Leaving it loose is definitely not recommended because the straps hold the rack and bike in position. Loose straps can result in damage to both the car and the bike. On the other hand, over-tightening will result in straps wearing out sooner than they should (weaker straps will break when too much pressure is applied). There is not an exact tension level I can recommend but a couple of tries should be sufficient to determine the correct tension required in the straps.
FAQ 2 Should I leave the extra straps hanging?
It is never a good idea to leave anything loose or hanging freely. Especially on a moving vehicle. The extra straps can be used to hold the handlebar in place by simply turning your bar into a position and fastening the extra bit with the car rack.
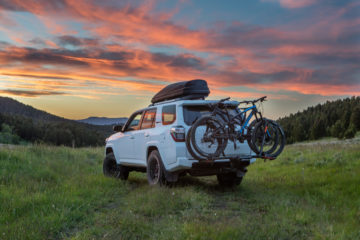
In case you are looking for a bike rack we recommend you start looking at what types of bike racks exist out there or consider one of the car-specific recommendations listed in the menu. Specifically for a sedan look at our civic bike rack recommendation while for SUVs check our RAV4 bike rack and Highlander bike rack recommendations.
0 Comments